Hardwood Floor Refinishing NJ is a vital home improvement project that can significantly impact your home’s interior. However, homeowners often view it as a costly expense rather than an investment that can pay dividends over time.
Once sanding is complete, vacuum the floors thoroughly to remove all dust particles. If not done correctly, tiny dust granules can become trapped in the new finish and cause it to feel uneven.
If your floors are badly scratched or gouged, refinishing them requires sanding, which removes the existing finish and roughens the surface for new layers to adhere. If the damage is severe, replacing the floor boards may be required.
When refinishing your hardwood, it is important to take steps to protect the rest of your house from wood particles that will be kicked up during this process. Apply plastic sheeting over doors to keep dust from migrating into other rooms. Tape over any floor registers that will be open during this project, as well. You will also want to pull up shoe molding along the wall-floor joint, if you have it, and carefully protect the baseboard with scrap wood before removing it. Likewise, it is a good idea to cover your furniture with tarps to keep it from getting dusty and dirty.
Before sanding, thoroughly clean the room with a mop and warm water, especially in corners and other nooks that a buffer can’t reach. Then vacuum and spray the floor with a floor cleaning product or your own mixture of 10 parts water to 1 part white vinegar, which will help prevent sanding residue from sticking.
The sanding process is done with a large floor sander, rented at most hardware stores. The first pass is made with a coarse, starting grit (often 36-grit), to remove the bulk of the old finish. Each subsequent sanding pass, with finer and finer abrasives up to 100- or 120-grit, will smooth the floor and eliminate the scratches left by the previous abrasive.
After the sanding is completed, you should vacuum again and wipe down the floor with a tack cloth to make sure it’s completely clean. Then, let the floor dry completely before moving your furniture back in.
Once the floor is completely dried, you can stain it. Choose the color that matches your taste, and use a foam applicator pad to apply the stain in the direction of the wood grain. Once the stain has been applied, you will need to wipe off excess with a tack cloth, and allow it to dry according to the manufacturer’s instructions.
Filling
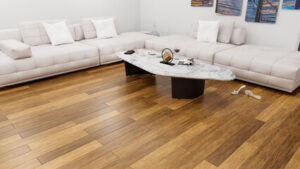
Hardwood floors are a beautiful addition to any home, and can last for generations if properly cared for. However, over time they can lose their luster and become dull and discolored. If this happens, refinishing hardwood floors is the best solution. This process restores the beauty and durability of your hardwood floors, and is a relatively inexpensive way to give your home an upgrade. Refinishing hardwood floors can also increase the value of your home.
Before beginning the refinishing process, it is important to remove all furniture from the room or rooms in which you will be working. Then, vacuum the floor thoroughly to remove any dirt and debris. Vacuuming will also help to prepare the surface for the stain, which will make it easier to hide any scratches or dings.
Sanding is one of the most difficult steps of this process, and it is essential to do it correctly to achieve a smooth, even finish. A good quality drum sander can make this step go quickly, and a sanding pole attachment can be very helpful for reaching the corners of the room and getting in between grooves.
Once the floor has been sanded, you will need to fill any deep or wide holes that are visible on your finished product. Wood filler can be found in most hardware stores, and it comes in a variety of colors to match your existing floor. Once the wood filler has dried, sand it again with fine-grit sandpaper to blend the repaired area with the rest of the floor.
After the sanding and filling steps, you can start the staining process. Staining can be done with a brush or a rag, and it is important to follow the instructions on the label of the stain you are using. Once the stain has dried, it is important to protect your newly refinished floors from water and everyday wear by sealing them with a sealant.
There are several different types of sealants available, including polyurethane and natural oils like tung or linseed. While polyurethane is more durable, natural oils can provide a warmer look to your wood.
Sealing
When the refinishing process is complete, your wood floors need to be sealed. The sealing step is one of the most important in hardwood floor refinishing to protect your investment and keep your hardwood floors looking great for years to come.
A professional Bona Certified Craftsman will use only high-quality, odorless polyurethane sealers. Choose from oil- or water-based options depending on your preference and follow the manufacturer’s directions for application.
There’s really no ideal time to refinish your hardwood floors. However, if your area is typically humid, it’s best to avoid refinishing during this period. Humidity can saturate the wood and cause it to cup, or raise in the middle of each board, creating a wavy appearance with raised seams.
Refinishing your hardwood floors is more of a cosmetic job than a structural one. But there are some things you can do to make the process go more smoothly and minimize inconvenience for yourself and your family. First, if you have pets, consider having them stay in a separate part of the house during the refinishing process. Not only will this ensure your pets don’t run across the newly refinished floors, it will help reduce the strong fumes that are produced during the sanding and staining processes.
Masking off doorways is another good idea to keep dust from escaping the work area and getting into your furniture and other surfaces in your home. This may seem obvious, but it’s a step that many people forget to take. Finally, it’s a good idea to remove any decorations on the walls that are going to be covered by the polyurethane finish.
While refinishing your wood floors is a great way to restore their beauty and extend their lifespan, resealing is an even easier and less expensive option for those who prefer the look of natural, unstained wood. A reseal will help your floors hold their sheen and resist scratches and other damage while also protecting them from moisture.
It’s a good idea to consult with your BCC for an assessment of the condition of your hardwood floors to determine if refinishing or resealing is a better option. They’ll be able to advise you on the type of stain and finish that will suit your tastes, as well as the current level of damage in your floors.
Painting
When the sanding is done, the last step in hardwood floor refinishing is applying a new coat of finish to the wood. The new finish protects the hardwood and makes it resistant to moisture and scratches. Finishes can include natural oils like tung or linseed, polyurethane and lacquer. Oil finishes are typically used for a more rustic appearance, while polyurethane and lacquer provide a shiny, high-gloss finish.
During the finishing process, it is important to follow all directions carefully to avoid damaging your floors. A poor finish can damage your hardwood flooring and cause it to become dull and lifeless. To ensure a smooth, successful finish, hire a professional floor expert with the necessary skills and experience to complete this project. A NWFA (National Wood Flooring Association) certified floor expert has completed extensive training and has the right tools to make your home’s hardwood floors look great again.
Before starting the refinishing process, it is important to remove all furniture from the room being sanded. It is also a good idea to close all windows and doors to keep dust contained within the room. Then, clean the floor using a hardwood flooring cleaner or a homemade mixture of 10 parts water to 1 part white vinegar. After cleaning, use a terry-cloth mop or a towel wrapped around a mop head to gently wipe the floor. Be sure to work the nooks and crannies that your floor buffer can’t reach with 180-grit sandpaper.
Once the sanding is done, vacuum the floor and wipe it down using a damp cloth to get rid of any residue left behind from the sanding. Allow the floor to dry completely before re-instating baseboards and uncovering vents and doors. It is also a good idea to wait a day or two before moving furniture back into the room and covering it with a felt pad to prevent scratching.
While refinishing your hardwood floors while living in your home is challenging, it can be done if you are patient and careful. The end result is a beautiful floor that can be enjoyed for many years to come. It is also a way to increase the value of your home, and it is much cheaper than buying new carpeting or other flooring options.